Warning: If you park your domain any active domain, email service, or any other service tied to that domain will not work anymore.
To Parking your own Domain using GoDaddy, please follow the step by step guide below:
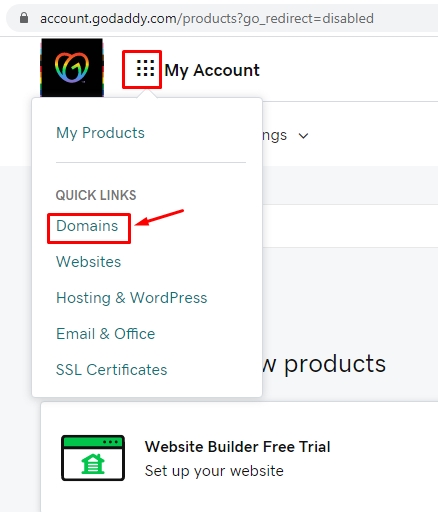
Log in to your GoDaddy Account > In the Dashboard, click the 9-dots icon beside the My Account at the top left corner > select Domains
Find the domain that you will have to park > click the 3-dots icon inline with your domain > click Domain Settings

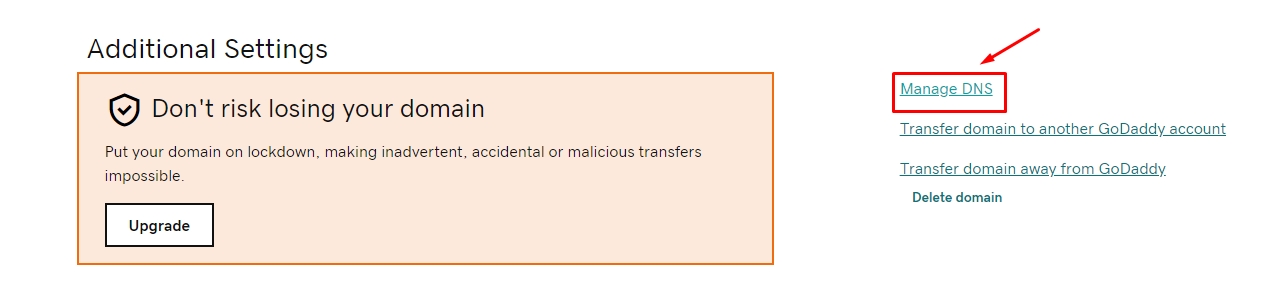
In the Domain Settings page, scroll down to Additional Settings > click Manage DNS
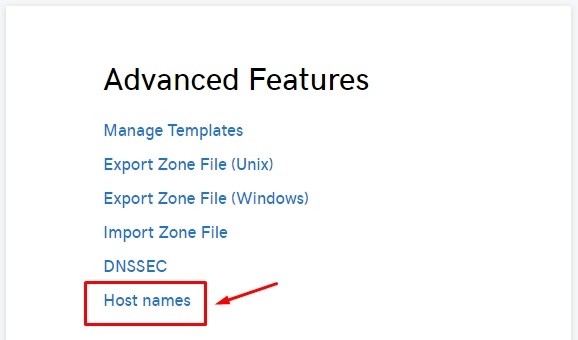
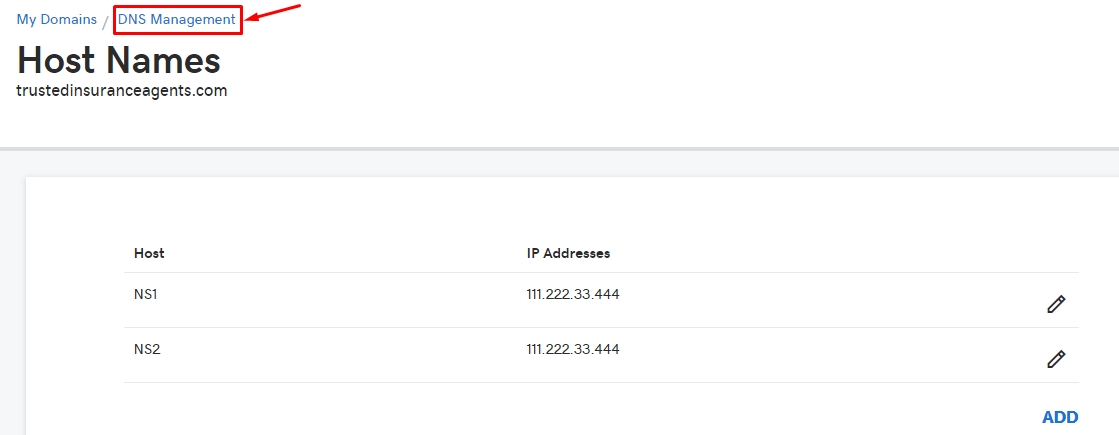
In the DNS Management page, scroll down to Advanced Features > click Host names
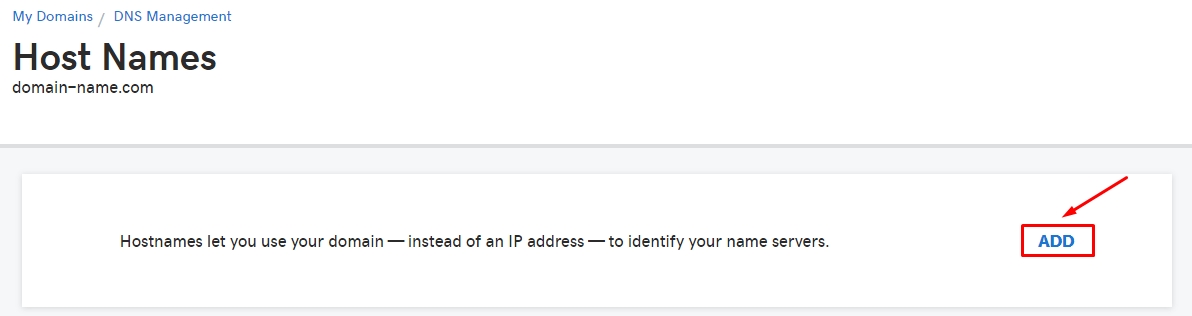
In the Host Names page, click ADD
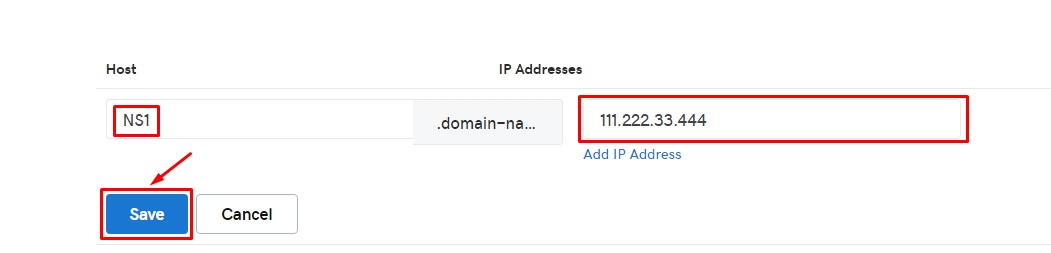
In the Hostname field input “NS1” and then input the IP address provided by your client success executive > click Save button
See sample below:
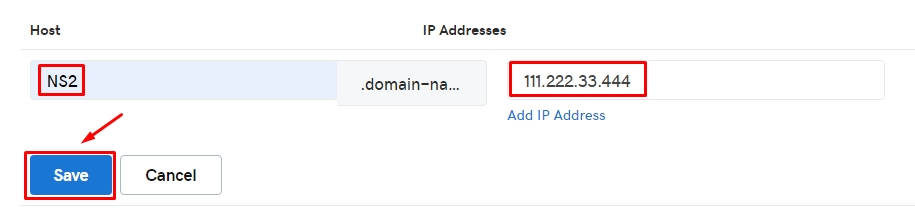
Now, you need to add another one – click Add button

Input “NS2” and then input the same IP address provided by your client success executive > click Save button
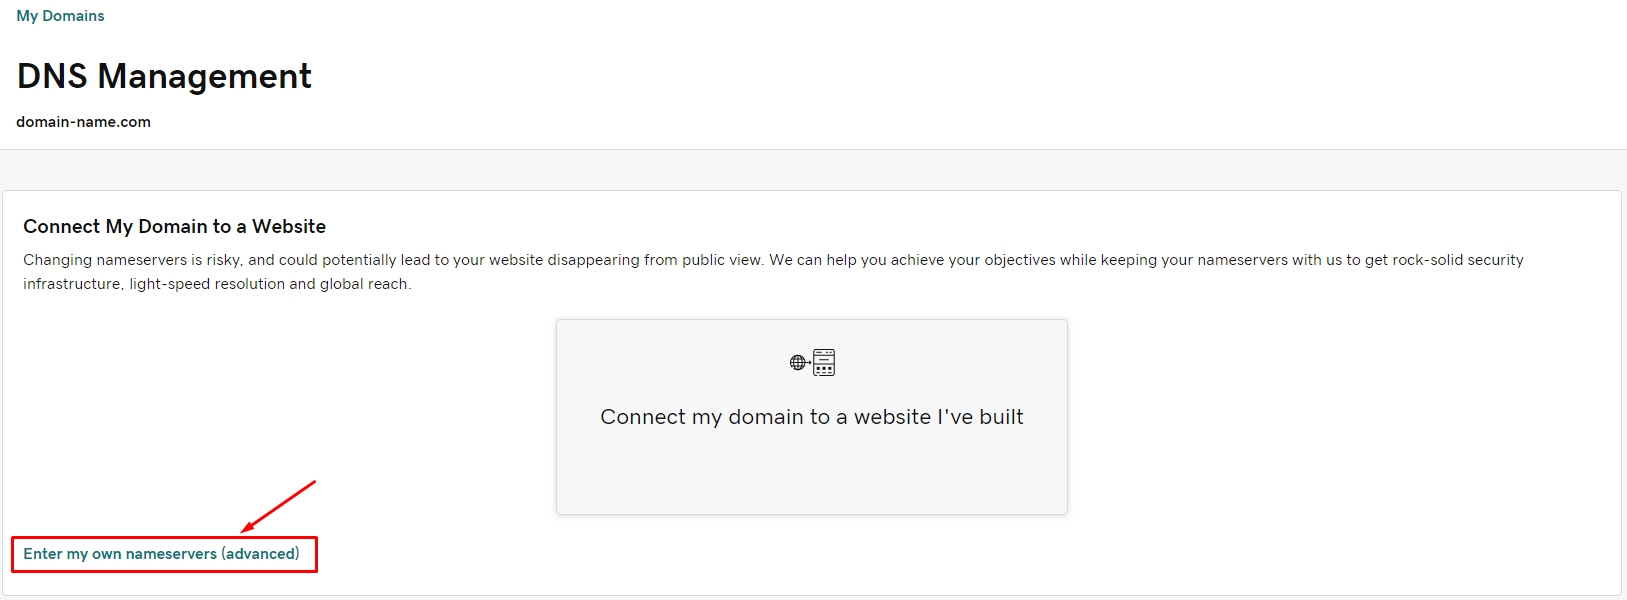
Now, click Domain Management at the top left corner
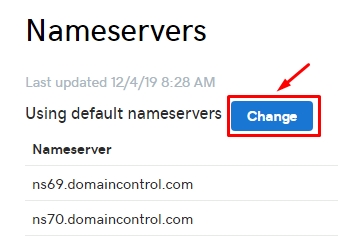
On the Domain Management page, Scroll down to Nameservers, it displays the default nameservers in your domain as shown below > click Change button
Click Enter my own nameservers (advanced) button
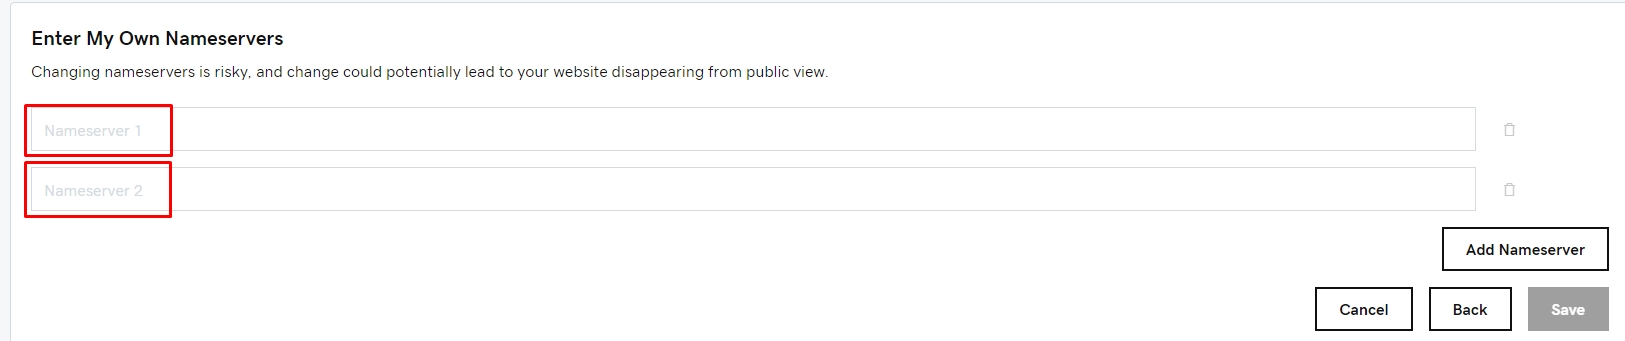
This will load up the field for your own nameservers. Follow the sample formats provided below:
Input “NS1.domain-name.com” and “NS2.domain-name.com” in the 2 fields > click Save button
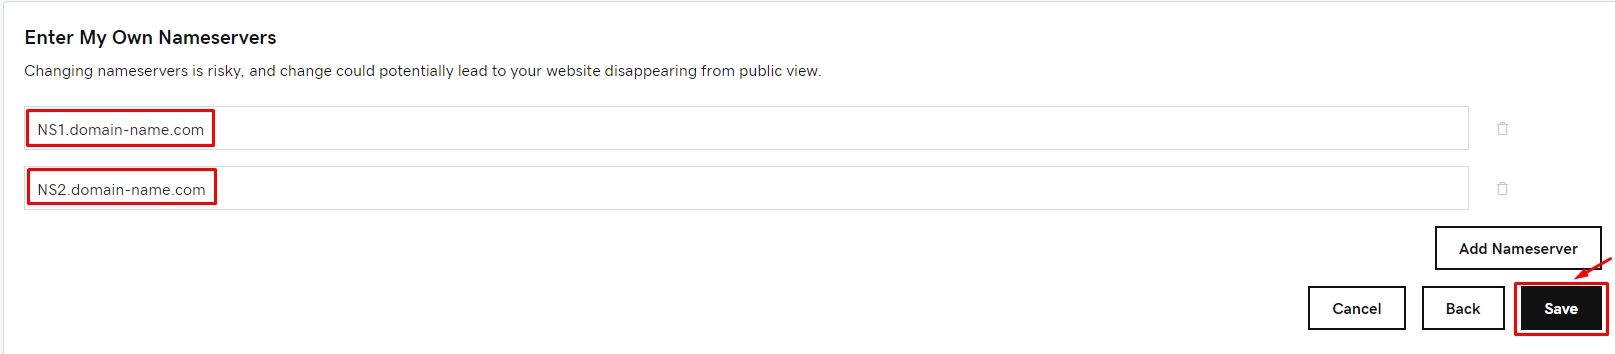
It will then load up all your Domain Settings – No further adjustments needed
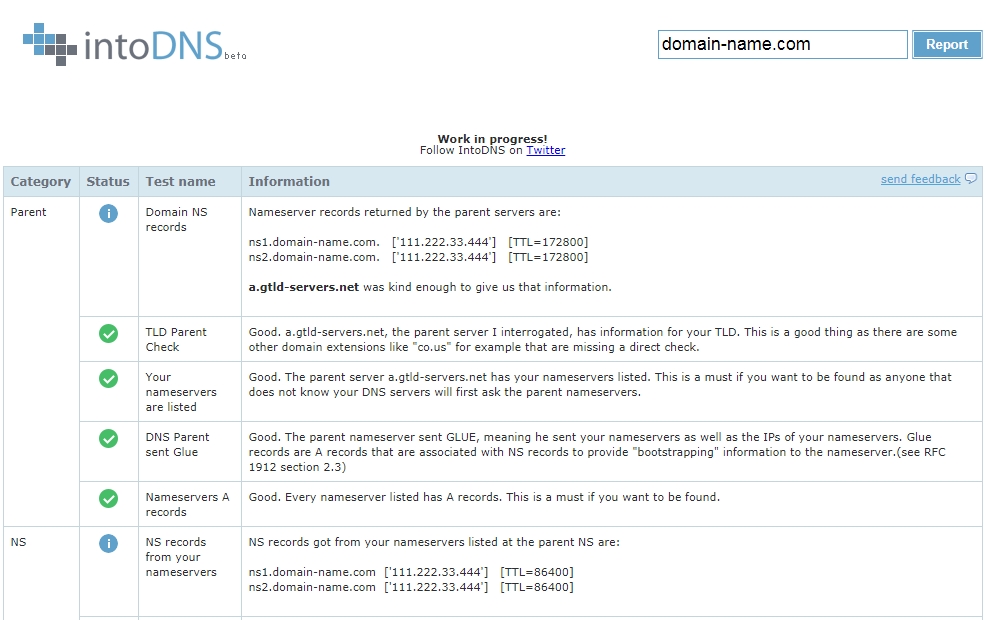
To check your domain update status, just go to https://intodns.com/ and input your domain name > click Report button
The result should show the same as sample below:
- Log in to post comments